How to make the image sequence bigger?

ok so i exported an image sequence and imported in into another file, i’m trying to make it about the same size as the other character, but it keeps being way too small, any help please?

here’s some screenshots (hopefully they appear properly), first one is the character i already have, second is the last frame of the image sequence i’m trying to export, and the third one is to show the size comparison between the two. also the image sequence gets bigger as it goes since it’s a character running towards the screen, if that bit of info is important to helping. i’ve also tried changing the camera on the image sequence frames before exporting them as an image sequence, i can’t remember if that affected the size at all or not.

@Rocky_Stone Hi. From what I see, you need to enlarge the camera size.

Pencil2D is a bit different than most drawing software. In other apps the canvas is always representing the size of the drawing surface. Whereas in Pencil2D what you see is represented by the size of the camera

Basically whatever the camera sees is how the final video will look in terms of movie size.

Double click the camera layer name > a dialog will appear to allow you to change the Width & Height of the viewfinder according to your current image. to view all of it once you export.

To learn more on how the Camera works please visit the following guide:


[Optional] Resizing Image Contents

However if you want to resize the actual contents as well, currently Pencil2D does not have this capability, so the only workaround I could offer once you need that is to export a PNG sequence and re-import it into Krita, which is a free image manipulation software that allows for sequence layers.

If you need to resize multiple frames on a layer, upscale without losing quality, use masks, and all that better try Krita instead.

Krita doesn’t have a camera, it’s more like photoshop or GIMP where you have the canvas only. Basically it’s something like this:

  1. Export a sequence of images (PNG) from Pencil2D. If you want them to have transparent background you can check a box in the export dialog.
  2. Open Krita (download it at krita.org)
  3. Go to File > New > Custom Document > Dimensions Tab > Width & Height > And remember that the new document needs to have the same canvas size as your current images. If you’re unsure of the size double click your camera layer in Pencil2D to know the size of the camera, which will also be the size of your final images.
  4. Go to File > Import animation frames This dialog will appear. image
  5. Make sure in the Timing section you specify the Start at 1. Step is left as 1.
  6. Import those images into Krita by using File > Import Animation Frames
  7. Click on the [Add images…] button > Browse your computer folders and select all the images you exported from Pencil2D.
  8. Press Ok and it will take some seconds to minutes to import the frames into a sequence layer.
  9. Once imported you’re going to enlarge the whole canvas along with the contents, this will affect all the frames. To do this go to Image > Scale Image to New Size… select the Filter dropdown box and pick the Lanczos3 filter. image image
  10. Once you do, in the Pixel Dimensions section set the Width and Height to modify the resolution to the final size you want.
  11. [Optional] This video also shows how to resize a canvas in krita in under a minute
  12. Once you have resized the contents of the layer, you will need to re-export all the frames / drawings as an image sequence again. Go to File > Render Animation > Select the Image sequence option. Though It should come selected by default if it’s your first time using this feature as video needs additional plugins.
  1. Select the file format as PNG
  2. Browse for an output location, but make sure it’s an empty folder, otherwise it will wipe whatever is inside and set the start numbering to 1.
  3. With this you can then re-import the images into a new Pencil2D project by going to File > Import > Image Sequence

Afterwards you can continue working with Pencil2D if you like.

1 Like

i’ve tried resizing the camera but i haven’t found the right camera size/resolution to make the images the right size yet, it also is trickier than it could be because the image sequence gets bigger as it goes along, so if i zoom in too much it’ll cut off some bits of the images, how should i resize it to fit the whole character in and be the right size? this is what the image sequence looks like (as a gif), so i’m having trouble finding the right balance between keeping the whole thing in the camera, and making sure it’s not too small. i’ve also changed the resolution to make the camera taller vertically but i don’t know if that helps or not, do you know what size/resolution i should have the camera?

@Rocky_Stone Hey. Well the resolution depends on the platform you’re aiming for. Video sizes are not really a mystery. Nowaddays you either go with half HD (720p) or full HD (1080p) or if you can afford the equipment you go up to 4K. Anything above that is feature film quality (16K images are being used somewhere in the world y’know).

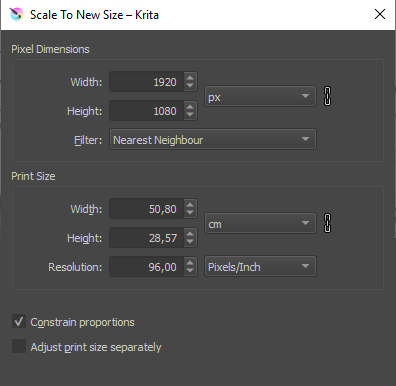
If you want to export for youtube for example, anything above 720p should be good. By the way 720p means 1280 (W) x 720 (H) pixels with an aspect ratio of 16:9 (16 pixels per every 9 pixels) and 1080p is 1920 x 1080 pixels

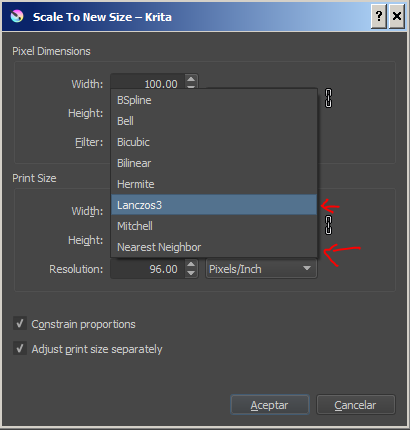
As for the image getting bigger, I don’t quite understand your problem to be honest. I shared the previous “guide” so you could not only fit the camera to your content, but also the content to the “camera” (by using Krita)

Are you unsure that the zoom will look good? or is it a problem where the images have different sizes altogether and you’re trying to use the camera zoom to “resize” the contents?

If it’s the latter, please don’t zoom with camera to “fix” your size issues. Even if you’re using vectors, it’s bad practice and later you will be bogged down by animating the camera with too much detail just because you didn’t resize all the frames to match a general scale guide by hand when you could.

What you can do is take some frames that look good in different shots and use those as guides.

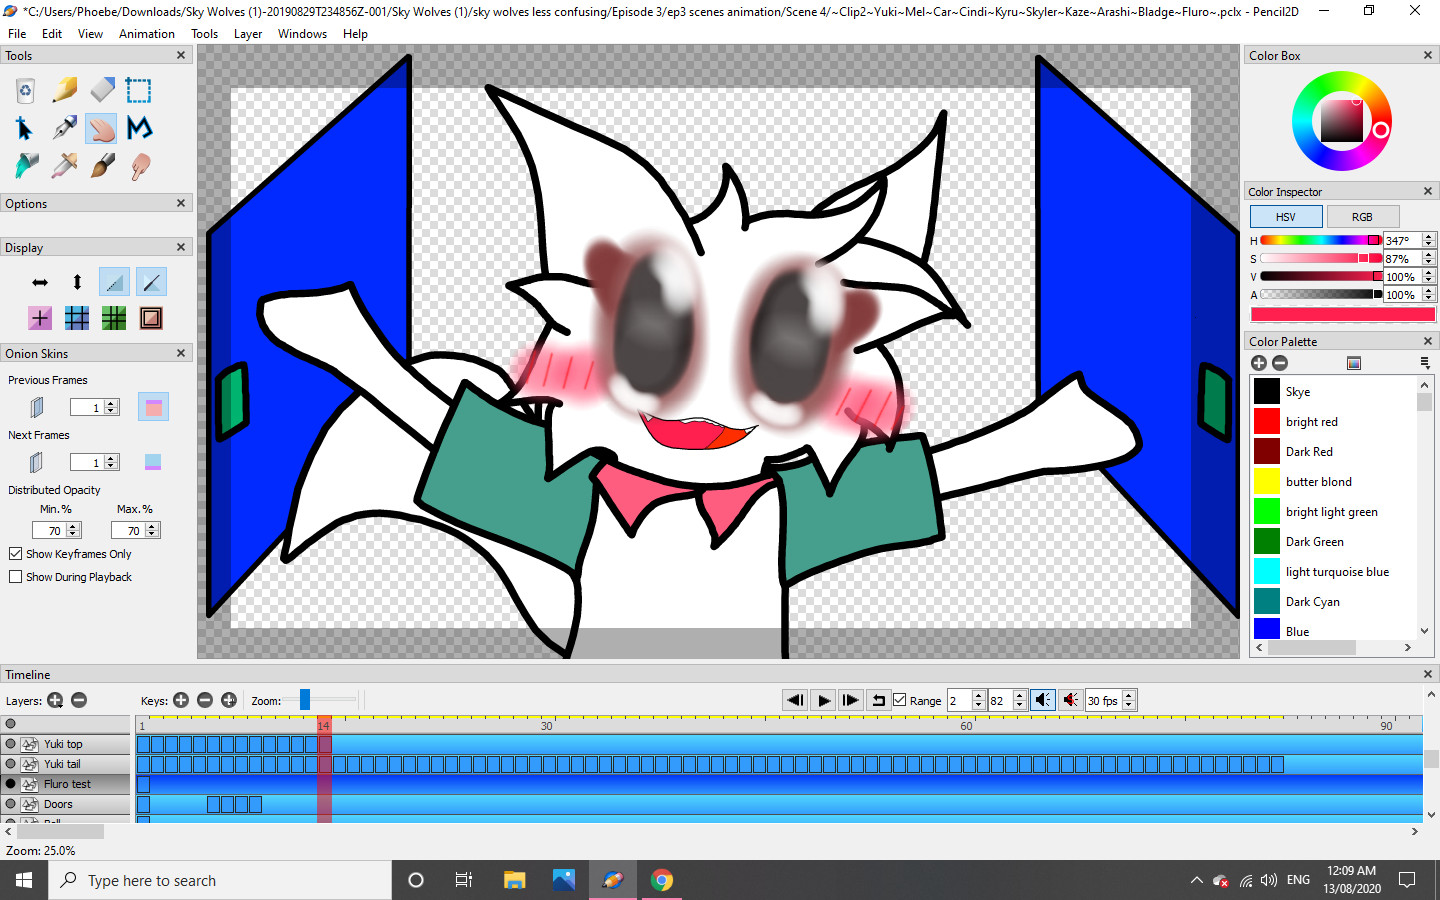
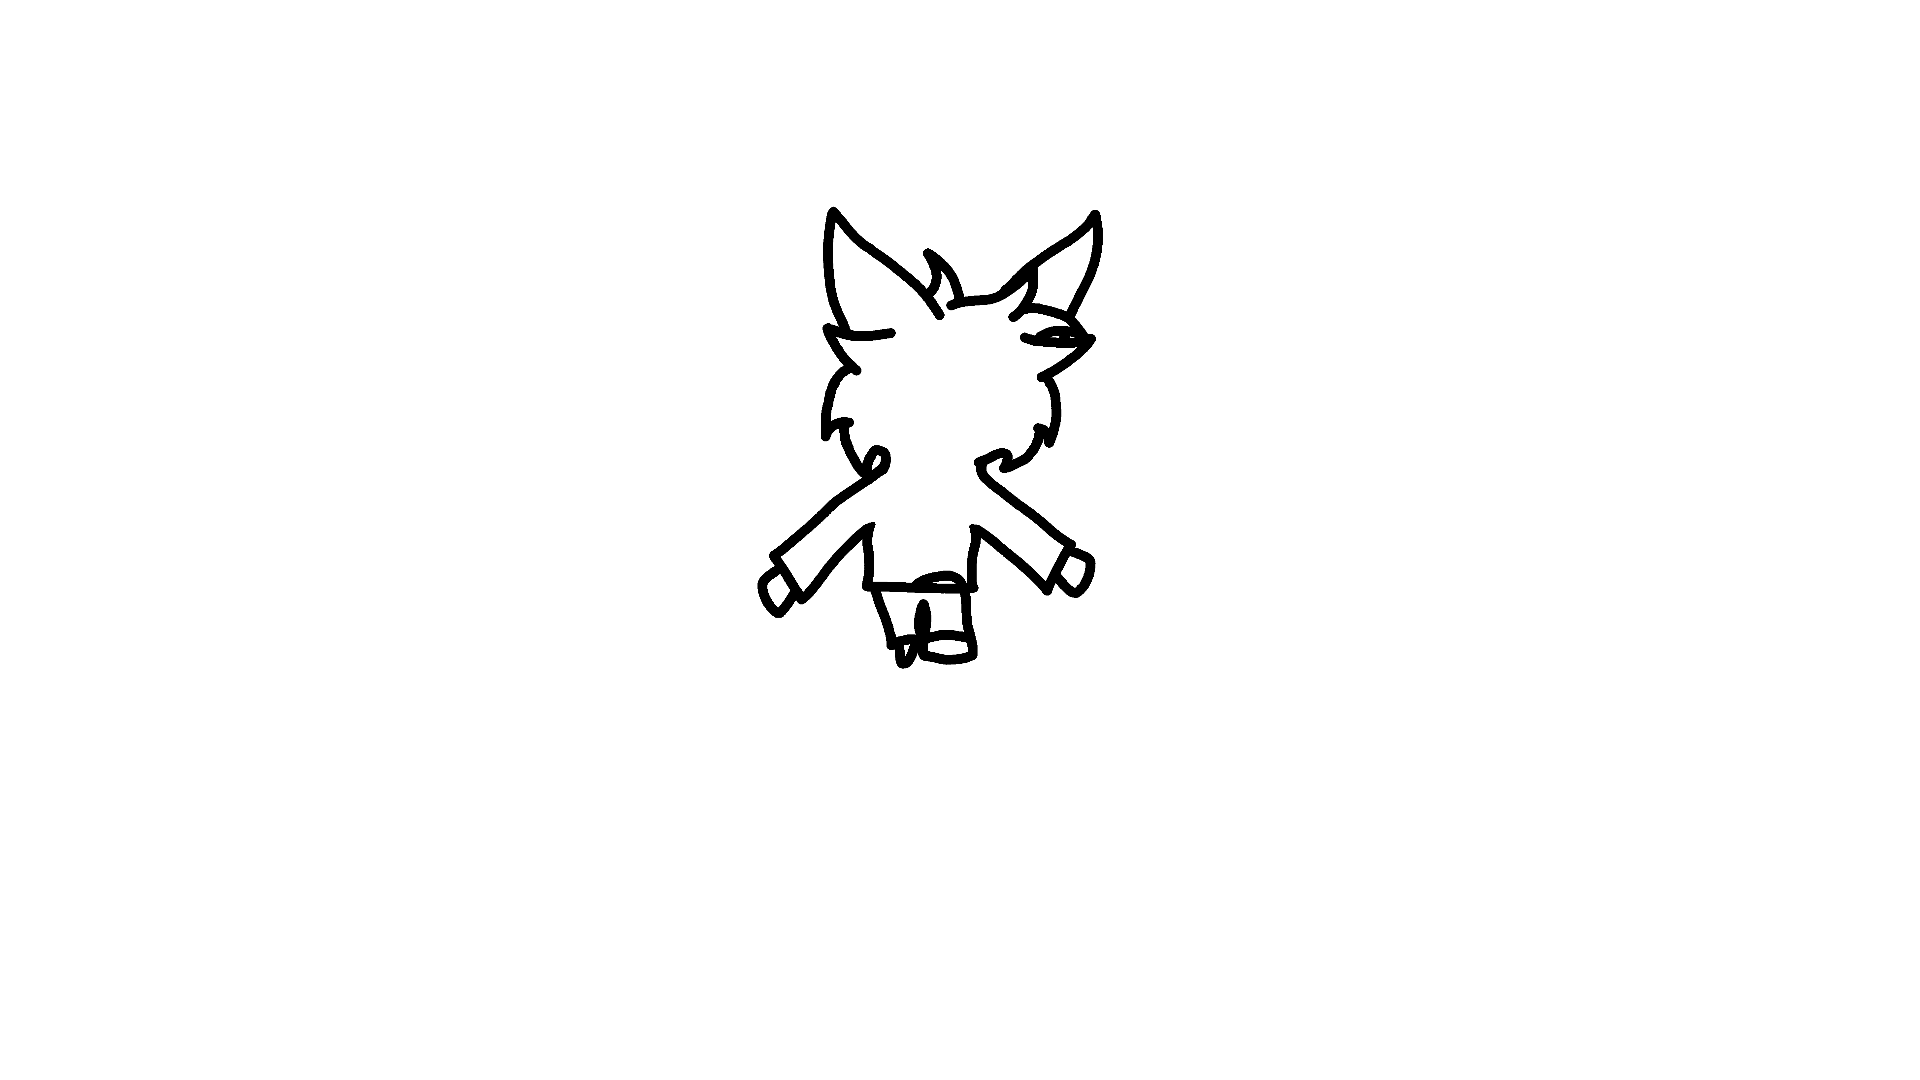
For example your first image is what we call a “medium shot” or “bust shot”, if it frames the entire body with little room above and below the camera frame it’s called a “full shot” and so on. So with those references handy match the size you need, and don’t be afraid of cutting artwork

The first image you showed was honestly fine. Often times animators draw a bit outside the frame to have more room when shooting the actual scene.

Seriously, unless you have like 1000 unique drawings and all of them have a size mismatch, just redo the sizing by hand. Use the black arrow tool along the selection tool and adjust the scale of each drawing while using onion skinning (if using vectors that is)

If you’re using bitmaps, well, use the guide from my previous comment, there’s no other way to resize bitmaps without using an image editor that supports animation and scaling algorithms (which Pencil2D does not support yet) You can resize each image individually as well, but you will need a lot of focus.

I’m sorry if nothing I’m saying makes sense to your particular problem. If nothing helps, try recording a video of what you’re actually doing to solve your problem, and with that I’ll try to come up with a better solution for you :pensive:

1 Like

Yeah I was trying to use the camera to change the image size, i guess maybe it doesn’t work like that ^_^;

the first image was just to show the character i already made and the size i was aiming for. also the reason i mentioned cutting out bits of the image was because when i import them into a different file i’d have to make sure they were lined up right, but i think i’ll just do what you said about resizing the images and then onion skinning over them or maybe animating a new sequence for the other character(s). thank you for the help, i really appreciate it ^_^ sorry for all the trouble :sweat_smile:

@Rocky_Stone Don’t worry I’m sorry I couldn’t provide you with a more efficient workaround :sweat_smile:

Sometimes animation is simply a grind and one has to become very flexible when using alternative applications to complement their functionalities. If you have any other issue please let us know.

1 Like

It’s alright ^_^ thanks again :smiley:

This topic was automatically closed 42 days after the last reply. New replies are no longer allowed.