Just for Fun drawing lines and using fills

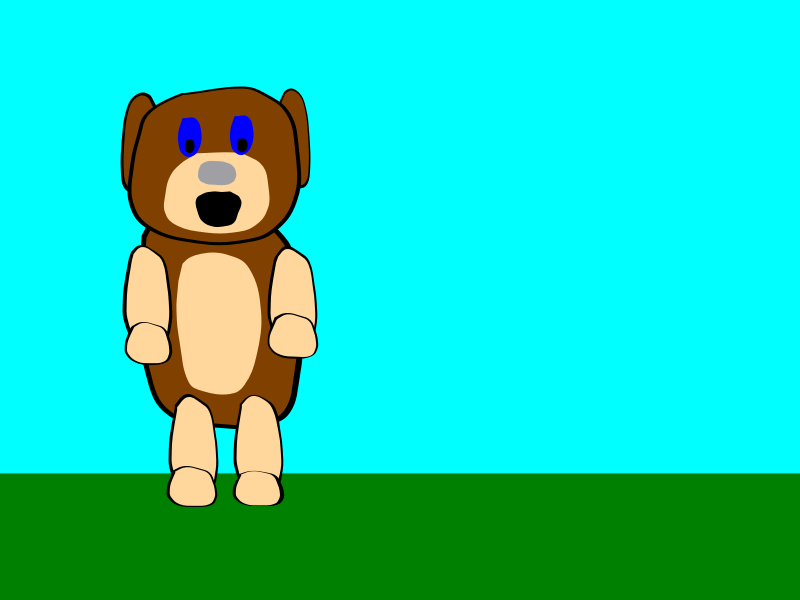
Drawing animations using vectors, rather than bitmapped drawings is interesting opportunity.

The character can be edited, by selecting body components and the moving, rotating and changing their size. There is also an option to change the shape, by using the Smudge tool, like in the case of the mouth shape.

The drawing tools are similar to the tools for drawing within the bitmapped environment, with the acceptation of the line tool. This initially appears as a series of straight line, this is converted into a smooth curve, by clicking on the line with the Smudge tool. This applies a smoothing coefficient.

In this and many applications the .VEC files are smaller than the equivalent bitmapped file.

The file below, allows the reader to examine how vector drawings can be drawn by using Pencil2D.

Pepper-3.pclx (201.9 KB)

The final animation, exported as a .GIF file.

Pepper-3

The animation can have sound effects added and then exported as an .MP4 file.

Drawing lines and then filling them might seem more difficult than drawing using bitmapped tool, but it is no

In terms of drawing, I draw the first frame from scratch. The other frames are rearrangements, I’ve changed the size of a drawing element, rotated them and rearranged them in terms of position, from the nearest to the camera and the layer nearest the background.

The initial shape is drawn using the Polyline tool as a series of short lines. Then using the Smudge Tool and left clicking on the line draw, it will be transformed into a smooth curve. Grabbing control point, again using the Smudge Tool and holding down the left mouse button the curve can be adjusted to achieve the desired shape.

The body of the character can be initially drawn as approx 20 short lines. Experience will tell you how many lines are optimal for your desired shapes.

The reshaping of the mouth was acheived using the Smudge Tool to move the control points, to acheive the desired result.

I’m not saying that using vectors is better, than using the bitmapped tools, no its just a different technique which you may not have considered.

If you are a beginner, then I suggest you work on multiple layers, for the different parts of your character. Then when your happy you can Copy and Paste them onto a single layer.

One definite advantage is that the drawing files are usually smaller than their bitmapped equivalents.

Another advantage is that if you enlarge a vector graphic, like the dog character, Ms Peppermint, the image still has crisp lines, I.e. there’s no pixcelation.

You can access a short guide to drawing using vector tools, by clicking on the link below.

Be patient, anyone with the link below can access the file, it takes a couple of seconds to allow access to you.

When you consider file size, I have discovered that when a Pencil2D project is zipped into a .pclx file that generally the file size of .png images are not generally reduced.

Unlike .vec, main.xml the master file for the Pencil2D project or the .xml file that contains the pallette.

The PNG format is already losslessly compressed, so compressing it again has little-to-no effect. If that worked, then you could just repeatedly recompress data until it’s the size you want! Unfortunately that’s not how information storage works. There are other things that could be done to reduce the size of pclx files, but they all have trade-offs such as in complexity and computational resource requirements.

1 Like

What you’ve said is what I expected you to say. But usefull never the less because not everyone will have the experience that I have.