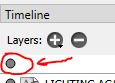
Hi, I’ve been trying to draw a cover for a short story I’ve been working on using Pencil 2d. I’ve just about finished it, but have been having issues since I’ve started trying to export it. Throughout making the project, I’ve made it so that only one layer is supposed to have 100% opacity, and all other layers are semi-transparent. I’ve done this using this little button thing (There should be a picture attached here- the little button right below LAYERS.)
 Anyways, when exporting (as a JPEG, I think) I found out I couldn’t change the camera layer to work with this, which made the exported image look really off, due to all the lighting layers that should be semi-transparent.
Well, whatever. I figured I should go back in my project and watch a few videos about exporting from Pencil 2d on YouTube to see if this was a common problem. But, for some reason, when it loaded in, it was… tiny? The picture that should be taking up the entire canvas was just a little thing in the middle of it. It wasn’t low-resolution or anything- just way smaller than it should’ve been. Actually, I think the canvas might just be way too big for some reason.
So, I’m pretty sure these are two seperate issues, but if anyone has any clue how I can fix either of these, any help would be appreciated. Thank you!
Anyways, when exporting (as a JPEG, I think) I found out I couldn’t change the camera layer to work with this, which made the exported image look really off, due to all the lighting layers that should be semi-transparent.
Well, whatever. I figured I should go back in my project and watch a few videos about exporting from Pencil 2d on YouTube to see if this was a common problem. But, for some reason, when it loaded in, it was… tiny? The picture that should be taking up the entire canvas was just a little thing in the middle of it. It wasn’t low-resolution or anything- just way smaller than it should’ve been. Actually, I think the canvas might just be way too big for some reason.
So, I’m pretty sure these are two seperate issues, but if anyone has any clue how I can fix either of these, any help would be appreciated. Thank you!
@I_Have_No_Name Hi Sorry to hear you’re having difficulties with the software.
Before trying anything else, please save a backup file copy on a pen drive or a file hosting service you use. Do not save over the same file over and over, as we’ve seen may people lose work because of this due to simple mistakes or a fortuitous events.
now, from your description there seem to be various parts that contribute to your issue. So Allow me to detail what I think might be happening and why:
Relative transparency
The button you are referring to is a feature meant to set how the editor shows layers to the user. It does not work for export and it has 3 options:
- Fully Opaque layers mode ( black circle in every layer)
- Relative translucency mode (grey circle in every layer)
- Isolate layer mode (empty circle button > black circle on active layer)
Version 0.6.6, which is the stable download version does not handle layer transparency at all.
Solution 1 Transparent colors can be painted by using the alpha property found in the color inspector.
Solution 2 In the development builds of Pencil2D you can actually change individual layers opacity nowadays. These builds can be downloaded @
I’m attaching an example of a red fill with 50% layer transparency that was exported as PNG. Loading this on a bitmap editor would let you see through.

Using a Dev version to change layer opacity
- Select the layer where you want to change opacity
- Visit the topbar menu > Layer > Layer / Keyframe Opacity
- A floating window will appear and you’ll be able to change opacity per layer or per frame, and it will be reflected during export.
Note: Please make sure you have backup versions of your project file in case of a bug or file corruption when attempting to use Pencil2D development builds.

JPG vs PNG
I’m sure you know this but just in case, JPG images do not handle transparency. You would need to use the PNG image format and activate the transparency checkbox when exporting images.
Transparency doesn’t work for most video formats either. If you want a semi-transparent video you could try WEBM lossy format or export a PNG image sequence and use a video editor that supports Quicktime (MOV) files with a PNG codec or ProRes 4444.
Camera Size vs Drawing Size
Basically whatever the camera size is, is what the final output size for any media will be. The canvas itself has no size.
For example if you imported an image with 4K resolution / pixel size, but the camera layer only has a size of 800 x 600 pixels, Pencil2D will only show a portion of the picture that corresponds to the size of 800 x 600 px. And that’s what will be exported every time.
However if you were to zoom out the camera to frame the 4K drawing, it could display the entire drawing at the resolution / pixel size of the camera (800 x 600 in this example).
By your description it could be either that the view was zoomed out by mistake or when you created your drawing, during the work process it was involuntarily zoomed in by a considerable amount and your drawing is actually smaller than what the camera size is.
To check what’s happening you can try the following:
- Select the camera layer (yellow colored)
- Go to the topbar menu > View > Reset View > Review if the size is OK. If not then continue to the next step
- Double click the camera layer > change the OUTPUT resolution until it fits your drawing (recommended) If this doesn’t work then set the size to a standard resolution (e.g 1280 x 720 pixels) and go to the next step.
- Select the camera layer > select the hand tool > position your timeline cursor over the first camera frame > Roll the mouse wheel to approximately zoom in or out the camera > Then use the hand tool to frame the entire drawing until it fits the camera.
Let us know if any of this helps ![]()