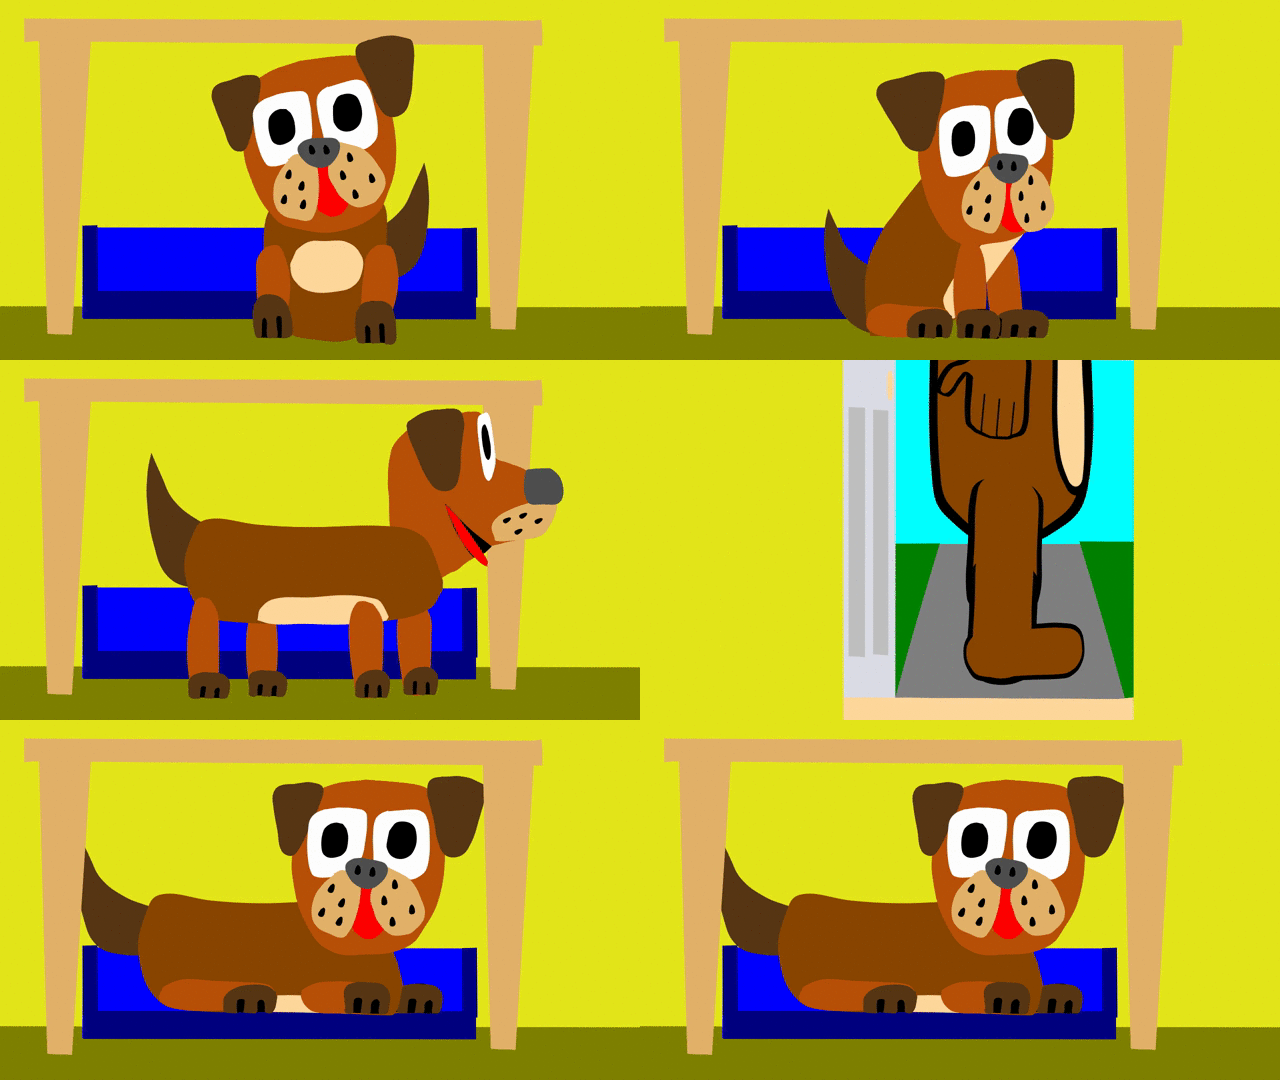
The pclx file required for this project is
Smuffy-1.pclx (475.9 KB)
Background
In traditional animation, like Tom & Jerry cartoons, they are told in a series of scenes, each with a common background. The animation style is slap stick this is a series of linked visual or behavioural jokes.
Whilst this is an excellent basis for writing, designing and drawing an animation it’s not the only way to animate.
We are going to explore the use of off scene sounds and looking at the action from the point of view of one of the characters. This is more like the technique used in live action films.
There is another background view, not supplied to you, that you will have to design using your imagination. Remember were drawing out backgrounds from the viewpoint of Smiffy. Her eyeline is much closer to the ground than our’s is.
Therefore when you draw the door and the wall, it only exists to table height, see the supplied background. Similarly you character only exists in this animation to the same height. Smiffy will only see her owners legs and shoes and a view of the outside of the door, within the same constraints. You could draw the background to human proportions and then position it, so that the required part is visible in the animation stage.
The Action Sequence
- There should be a suitable pause where little action occurs, save Smiffy moving her tail.
- Steps are heard outside, Smiffy reacts.
- The door bell rings, Smiffy reacts and the background changes to the door. This is called Point of view, usually shortened to POV shot.
- The door opens, revealing the view on the other side of the door and the visitor, legs and shoes only.
- You can include a simple saying, like ‘Hello Smiffy’ and possibly the sound of the door closing. This could simply be the same sound as the door opening.
- Cut to Smiffy in her basket. No need to include her moving from previous position into the basket.
Style and Techniques used
It’s up to you whether you use Bitmapped or Vector techniques! But this assignment is designed as an introduction to Stop Motion Animation. There is a layer in Smiffy called Smiffy_Parts, the three frames contain a kit of parts, from which you are required to construct any other frames of Smiffy that you require.
The view outside the door, could for example be a view into a garden, front yard or balcony if location is a block of flats. The choice is up to you, you’re the animator. You could start by taking a photo of a suitable location to use as your inspiration. You can use the overdrawing technique if you want. But keep the drawing simple to fit in artistically with the background supplied inside.
The aim is to make a very short, but interesting animation, using POV, sound and careful timing.
Hint
When your animating it is a good idea to save your work regularly, it is equally an excellent idea to change the filename, from say Smiffy-4.pclx to Smiffy-5.pclx when you have made significant changes. This gives you both a record of your changes and a version to revert to if your latest changes are a mistake.
The box layer, is there because there is no horizontal or vertical flip in Vector mode.
Working with Vector Images
You can manipulate a vector image, this includes Move, Rotate, Edit Shapes and Change Colours. Shapes are defined as a Line and a Fill. Each 1 of the shapes that compose the Penguin is stored as a shape and fill, even the eyes. Therefor each one can be Selected. Moved etc.
Editing a Vector Image
Vector images are stores as a stack of shapes. The top images are fully visible, if the shape below it is partially underneath it only the visible section can be seen. For example the tummy, in white is on top, the blue of the body is underneath it. This allows you to draw the blue shape, body, the entire shape of the Penguin body. This system allows you to resize the white tummy area without resizing the whole Penguin.
The Beak is on top of the Penguin body as also are the eyes, if required each of these can be moved if required without changing any other part of the Penguin.
Changing the Size of a Selection
When the drawing or part of your drawing selected, by using the Small grey boxes and the mouse, the shape or whole drawing can be enlarged or reduced as desired.
Making a selection
Use the Arrow with plus sign on the right of the tool pallet. When the selection has taken place a box will appear around with a tiny grey box on each corner.
Moving a Selection
You can now by moving your mouse. Which moves the Arrow & plus sign box around the object selected. Click the Right Mouse Button and move to desired position. You can of course select more than 1 shape at a time.
Rotating a Selection
The selected shape can be rotated by pressing the key and moving the mouse.
Changing the Colour of a Shape
To fill the area, click on the middle of the desired area. If the shape is selected as above, both the fill and line colour will be changed to the new colour. With the shape selected, using the Paint Bucket tool, Select a colour and the move the paint bucket into the middle of the selected area. When you press the Right Mouse Key, your selected colour will fill the area.
