There was an old topic on what the ‘hidden’ shortcuts where for brush size, but that’s 404 and I am not finding it anywhere else.
Technically I am looking for pencil tool size + and -…
@PsychotropicDog well it’s true that such keyboard shortcuts are missing. Instead there’s a sort-of experimental feature that you can enable called “Quick-sizing”. To do so go to EDIT > PREFERENCES > TOOLS > And turn the toggle for [X] Use Quick Sizing
Once you do that, the canvas will bug out, so you have to restart pencil2D. Then after that you will be able to use the dynamic brush sizing by pressing SHIFT and left-clicking & dragging your mouse/stylus.
Note sometimes this may cause unwanted behaviour but it’s currently the only way to resize the painting tools without using the tool panel sliders.
Thanks, that works out ok, as I can use the useless ‘hand’ button on the huion 610 pro for that (already have 2 buttons on the stylus that pan). It is certainly better than clicking the +/- buttons or typing in a value.
Instead there’s a sort-of experimental feature that you can enable called “Quick-sizing”. To do so go to EDIT > PREFERENCES > TOOLS > And turn the toggle for Use Quick Sizing
Once you do that, the canvas will bug out, so you have to restart pencil2D.
@JoseMoreno what do you mean by “bug out”, enabling quick-sizes shouldn’t do anything related to the canvas that will require restarting the application?
also what are the other unwanted behaviours you speak of?
@MrStevns Hey man. Actually when I was writing that post and was testing the workflow, after I enabled the quick sizing and I painted on the canvas there were a few artifacts on the canvas, like a layer above the pixel paint itself. I didn’t have much time so I closed and reopened the program and it went away. I just tested turning it off and then on again but the artifacts didn’t appear. If I notice it again I’l make a report.
I could go back and try to break it again…
I have no problem with enabling this.
However, maybe I should start a new topic regarding the passepartou not resizing correctly when trying to set the camera to 64x64 (the passepartou does not zoom, even though the drawings will). Restarting does not cure this.
The passepartou issue is actually known. The workaround is that once you resize the camara click another layer then click back on the camera layer and it will update automatically.
Edit: I’m sorry, I re-read the comment and there are actually two issues happening on the camera. One is the passepartout sizing which I already mentioned, and the other one is that when you move the camera while having the camera layer active you are actually not resizing the canvas but moving the camera, i.e changing the closeness to the canvas. This is also known.
If you are working on pixel art, resize the canvas on the camera layer and immediately change to the bitmap layer in order to be able to zoom discretely and see the grid. To change the grid size you can go to EDIT > PREFERENCES > GENERAL > GRID Section > The number is the pixel size of the squares.
You can enable the grid by pressing the G key.
@PsychotropicDog I just edited my previous comment to fully explain what is happening. Sorry about not reading your previous comment properly at first.
err…
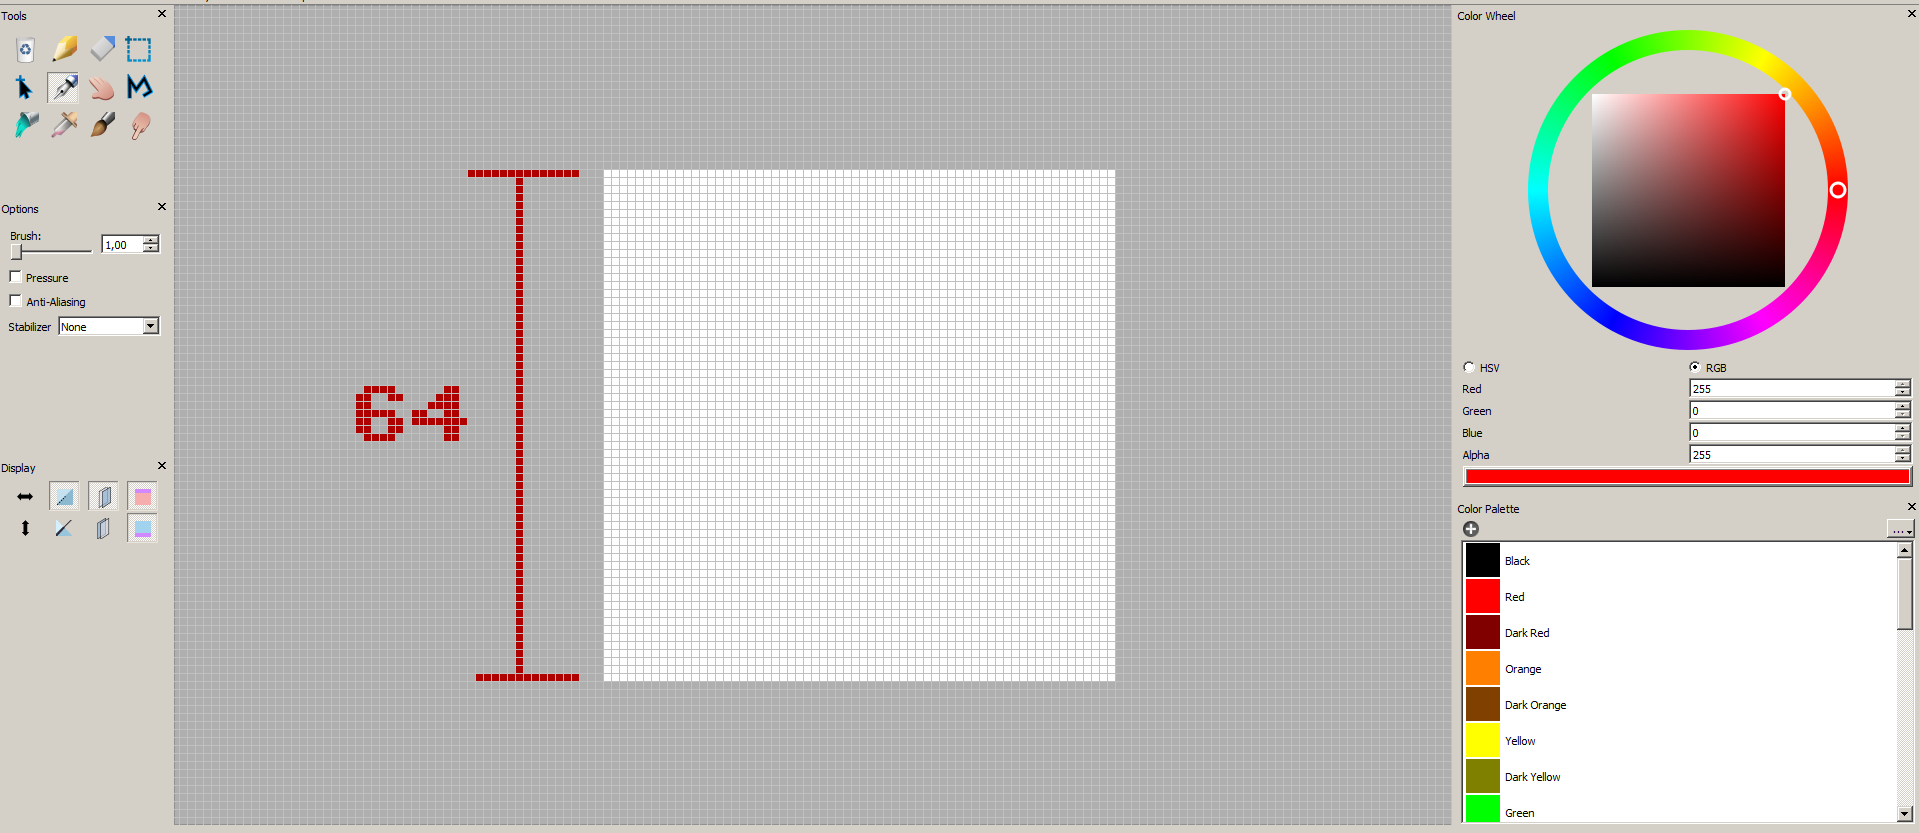
I set camera to 64x64
press grid – (g)
kind of not good when it is 50… set to 1 pixel
hmm… not right size compared to passpartout - it was cetainly going to be more than 64x64.
set to 64 size grid - one would expect that a 64x64 would fill up one grid space (or stradle the lines) but no, it does not do that at all.
Restarting and using the same file - well I can not tell you what is going on, once the passepartout is too large, another time to small. Certainly not 64x64.
Starting a new file yields more predictable results. But it does mean some advanced planning before getting too far.
@PsychotropicDog Hmm, Im sorry it seems I’m honestly failing to understand. I did the steps and I got this result relatively quick. Is this not what you want? a 64 x 64 px canvas with a 1-pixel sized grid?
If not then could you post an image of what you need exactly as seen in a different software and how it appears in Pencil2D so we can review how to help out?
Now the camera is set to 64 x 64 and you can see the 43x43 outline…
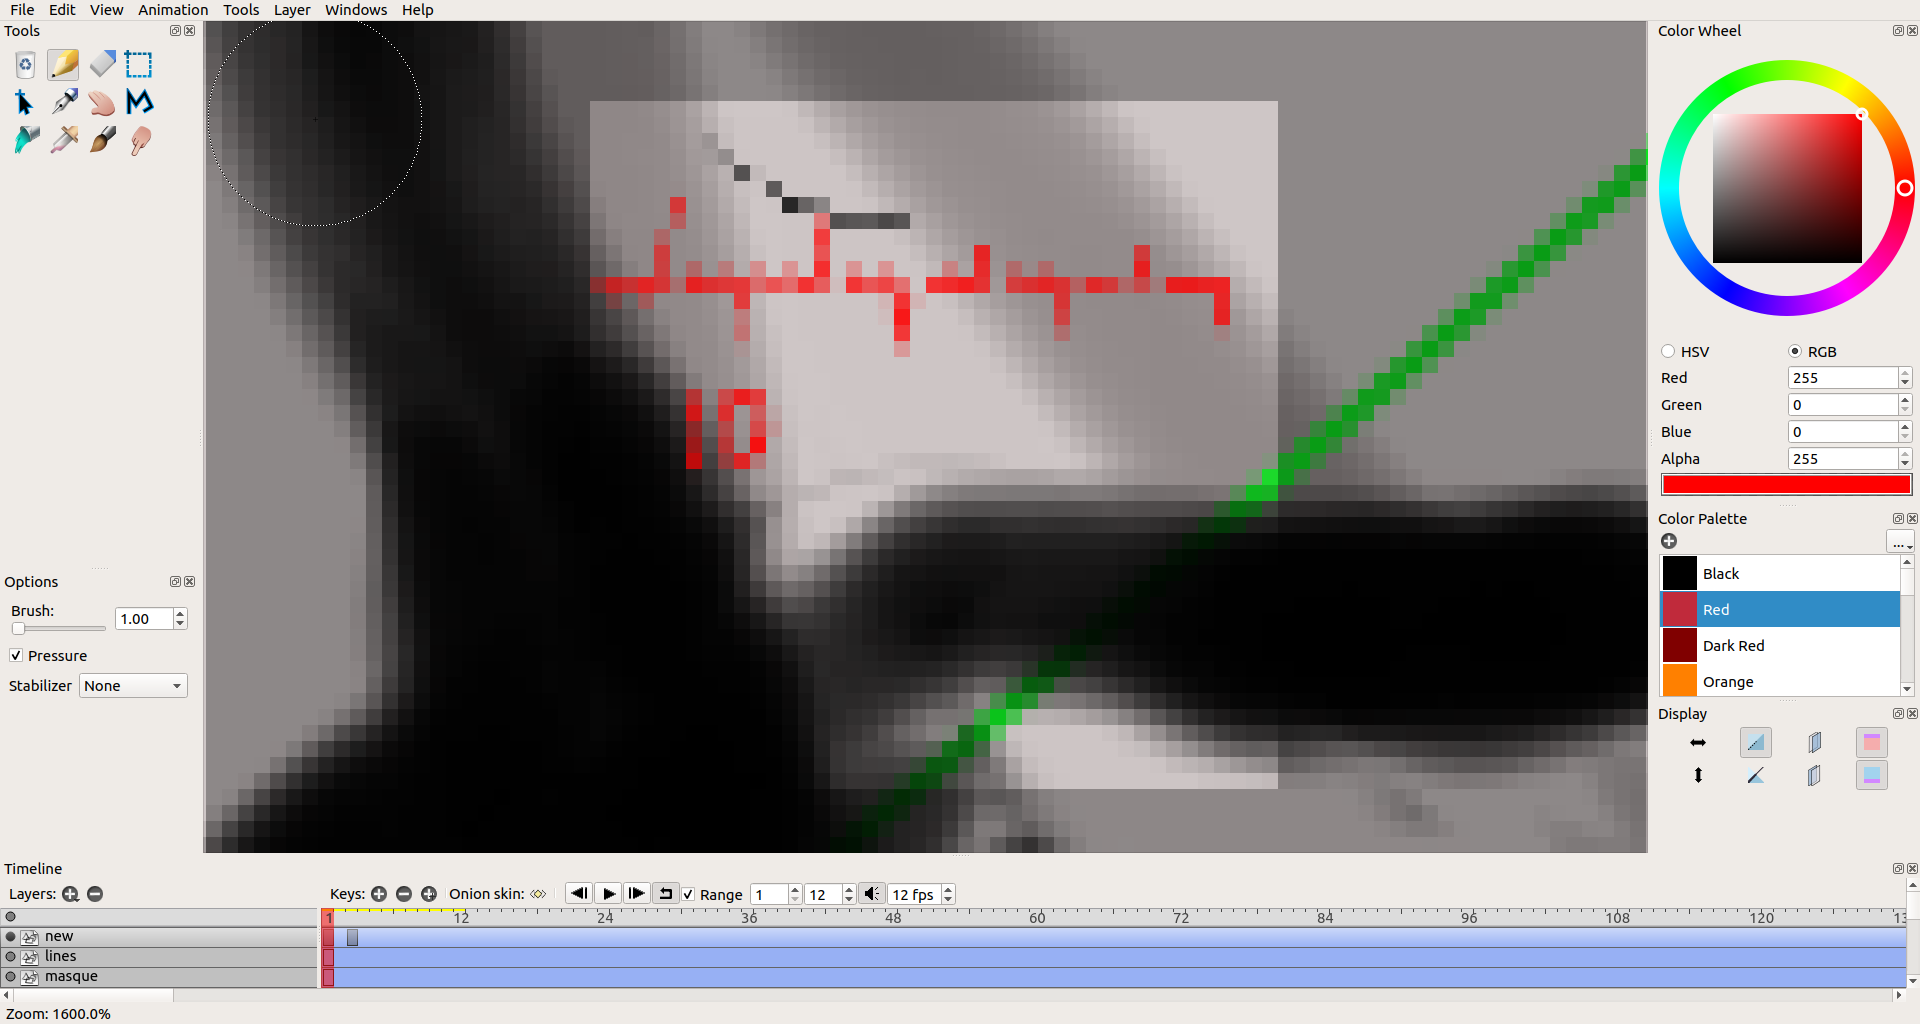
I have determined, that if I scroll out mouse wheel zoom, right after clicking ‘cancel’, then the passepartout I end up with depends on how much I zoomed out. I can repeat this every time by starting up the program, load the file, choosing camera, cancel, zoom out, then switch layers.
@PsychotropicDog Alright. Then I did understand that you were using the camera. So the advice is. Don’t zoom the canvas while using the camera layer. Or else the picture will become antialiased like that. You HAVE to zoom only while the bitmap layer is selected.
The camera does give you the absolute resolution size at it’s default zoom. But again, using the zoom function ON the camera layer zooms the CAMERA, zooming on any drawing layer, zooms the VIEW. They are different procedures.
Take these steps for absolute clarity:
- Start the program
- Start a New File / Or load a previous File
- Select the Camera Layer and Double click on it to change the image size (which is what the camera sees and what you can export) to 64 x 64
- If you already moved the camera press CTRL + H to reset the CAMERA zoom to it’s default state (you are supposed to still have the camera layer selected)
- Select the bitmap layer you want to draw with.
- ZOOM IN with either scroll wheel or by pressing CTRL + UP / DOWN ARROW to get a discrete zoom %
This way your VIEW will zoom and you’ll be able to properly see the pixels.
For your tools you have to turn off the antialiasing. For the screenshot I sent I used the Pen tool with 1px size and no antialiasing. The eraser as well.
If this doesn’t explain properly let me know and I’ll make a video guide when I have some free time. But hopefully this can help you out.